Original post was on the Art Glitter Blog:
http://artglitterblog.blogspot.com/2009/11/glittered-toy-blocks-storybook-toy.html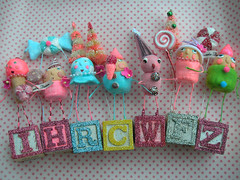
How many times have you walked into a store, saw colorful holiday trees for every occasion and in every color, some are pink, aqua and tinsel silver, others are extra enhanced with chunks of mica flakes, snow and glass glitter. Well I have found many ways to change the look of plain green trees from bottle brush to floral and wire Christmas trees, all you need is a tree, some bleach and Art Glitter.
Materials:
Art Glitter-Art Glitter:
Designer Dries Clear Adhesive-Art Glitter:
Variety of Ultrafine Transparent Glitter
-Art Glitter:
Variety of Ultrafine Opaque Glitter-Art Glitter:
Variety of Fine Glass Glitters (For various effects)Paints/DyesAcrylic paints: variety of bright, pastel and metallic colorsFlocking: variety of colorsOtherHand sculpted clay figurine or store bought plastic or paper figurineSmall-medium sized bleached bottle brush trees (refer to tree bleaching and dye instructions)Container of waterTools: paintbrush, scissors, hot glue and hot glue sticksOther: crepe paper, paper, tinsel garland, tinsel chenille stems, small bulbs, millinery flowers, tiny pompoms, sequins, tiny pearl strands, flocking
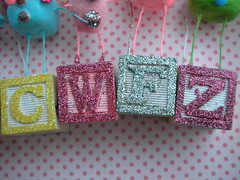
Directions for Glittering Toy Blocks
1. Coat the lettered rim part of a toy block with Dries Clear Adhesive.
2. Sprinkle wet adhesive with glitter of choice, let dry then slightly tap off excess.
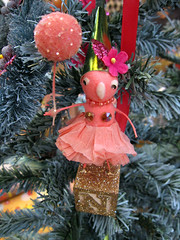
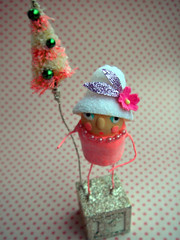
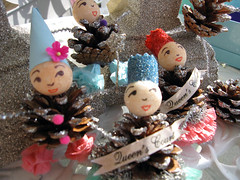
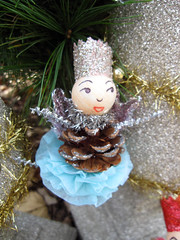
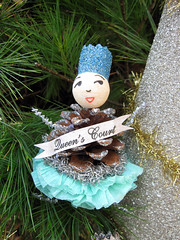
Directions for Toy Block Dolls
1. Attach figurine of choice to toy wooden block using hot glue, let set a minute.
2. Begin decorating your figurine w/ flocking, texture glitter or glitter of choice. Adhere these textures using Art Glitter Dries Clear adhesive, let dry and tap off the excess.
3. Decorate your toy top with a small bottle brush glittered tree, glittered crown, glittered hat or mini bell, berries, millinery, crepe paper and tinsel.
4. Coat the toy block base using a variety of Art Glitter products.
Tips:-Use basic wooden square shapes, instead of toy blocks and coat w/glitter.-Use cupcake/sugar craft figurines and picks instead of sculpted ones.-Hot glue toy blocks to a floral wreath, add a holiday word banner and coat the blocks in various coordinating glitter colors.-Spell out your favorite holiday word using toy blocks and glitter.

Glittering and Bleaching TreesMaterials:
Art GlitterArt Glitter:
Designer Dries Clear AdhesiveArt Glitter:
Designer Dries White AdhesiveArt Glitter:
Faux SnowArt Glitter:
Vintage Fine Glass Glitter #611 Antique SilverArt Glitter:
Vintage Fine Glass Glitter #613 Diamond DustArt Glitter:
Variety of Fine Glass Glitters (For various effects)Paints/DyesAcrylic paints: variety of bright, pastel and metallic colorsInk, KoolaidSpray paint base coatSpray paint or hair color spray paint: variety of bright, pastel and metallic colorsBleachOtherSmall-large sized trees (bottle brush or holiday Christmas trees)Large plastic storage container (for big trees)Small plastic or foil pan (for small-medium trees-bottle brush)Painters ventilation mask(for spray paint)NewspaperRecycled box (for spray paint)Container of waterTools: paintbrush, old salad tongs, scissors, hot glue and hot glue sticksOther: tinsel garland, tinsel chenille stems, small bulbs, millinery flowers, tiny pompoms, sequins, tiny pearl strands, flocking
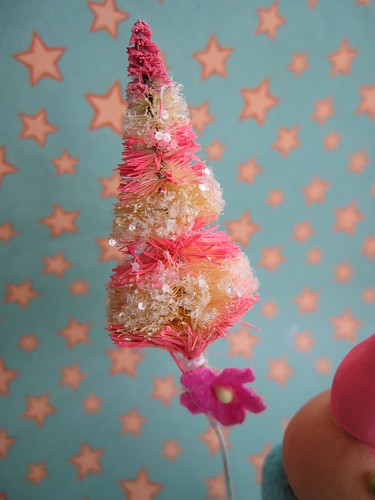
Directions for Bleached and Glittered Bottle Brush Trees:
Use in ventilated area, I recommend outside or in garage
1. Place bottlebrush trees in a large pan, cover with bleach, turning trees with tongs every 5-10 minutes or so until completely bleached and no green color remains. Smaller trees will bleach faster, larger ones longer.
2. Let dry for 24 hours on a stack of newspapers or disposable plastic plate.
3. Once trees have dried, begin painting or dying them. To spray paint color on them, place in a recycled box and spray paint with the color or your choice. To dye them follow the drink mix recipe below, once dyed, let dry.
4. Once your trees have been colored and dried, apply designer dries clear adhesive to them. With a paintbrush paint the adhesive onto all the edges.
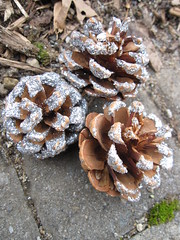
5. Next sprinkle some #611 Antique Silver Glass Glitter or # 613 Diamond Dust onto the pinecone, let dry, shake off excess. For snowy trees apply the Dries White adhesive followed by Faux Snow.

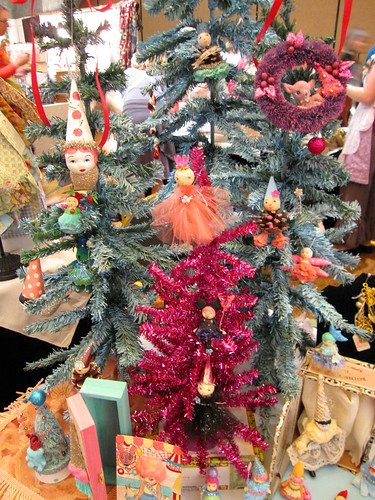
Directions for Bleached and Glittered Large Christmas Trees:
Use in well ventilated area, I recommend outside your house
1. Place medium to large trees in a recycled box or on a bed of newspapers, place tree onto this area, put on ventilation mask, and spray paint with the spray paint base coat, let dry 10 minutes, repeat.
2. Now spray paint with color of choice, the more coats you spray the brighter your trees. Always follow spray paint manufacturer instructions.
3. Once trees have been spray-painted and dried, apply Designer Dries Clear adhesive to them. With a paintbrush paint the adhesive onto all the edges.
4. Next sprinkle some #611 Antique Silver Glass Glitter or # 613 Diamond Dust onto the pinecone, let dry, shake off excess. For snowy trees apply the Dries White adhesive followed by Faux Snow.
5. Decorate with tinsel, tinsel garland, bulbs, millinery and glittered ornaments.
Koolaid Drink Mix Dye Recipe
In medium sized bowl mix the Koolaid powder with 1/4 to 1/3 cup white vinegar. For brighter colors use less water and more powder. For softer colors use more water. If Koolaid is not available replace with food coloring or inks.Pour Koolaid dye over your trees and turn w/tong until completely dyed, repeat until desired color is achieved, let set and dry 24 hours.Tips:-Try glittering your trees with a variety of glass glitter colors-Paint stripes onto your bottlebrush trees.-Turn the trees into dolls using clay or foam heads, and other embellishments-Glitter Christmas tree stems each with a different color or with two favorite colors, how about pink glass glitter on one stem and silver glass glitter on another stem.


