Friday, February 20, 2009

Vintage Beeswax Doll

Materials
-Beeswax, Beeswax Pellets (Suze Weinberg)
-Melting Pot
-3-D Doll molds which can sustain hot wax
-Foil cookie sheet
-1/2 yard Muslim Fabric
-Scrap fabrics: Crinilon, Tulle, Lace, Tafeta, Velvet, etc.
-Batting
-Sewing Machine
-Needle and thread


Directions
1. Pour beeswax into the melting pot and heat according to melting pot directions.
2. Place the mold of choice onto the cookie sheet to protect working surface.
3. Now pour the hot beeswax into the mold, let set/harden, pop out for a doll head, repear for the doll arms and legs, again using doll molds.
4. Pierce holes into the pieces, set aside.
5. Measure out 2 pieces of muslin to 8 inches long by 4 inches wide. Lay pieces on the rectangle shape, trace the ends onto the muslim with pencil, this will mark the place on the fabric where you will not sew.
6. Stitch the pieces together, remembering to leave the marked lines open. turn right side out, through one of the open holes.
7. Now insert the beeswax doll parts into their open slots, sew through their pierced holes and into the fabric with needle and thread, until secure.
8. Decorate with a homemade dress, paint, embellishments and more.

Project Options:
-Just make beeswax doll parts for your projects.
-Use a old cooking pot with thermometer to melt your beeswax (keep this pot now strickly for art projects)
-Make larger or smaller dolls and adjust your cloth body accordingly.
-Make Beeswax embellishments for scrapbooks and altered project glue in place with
E-6000 or clear caulk.
-Always use caution when working with hot, sharp or strong glue materials, remember good ventilation with strong chemicals and glues.

Doll Head Wands

Materials:-Half Doll, Tassel Doll or Doll Head
-Wooden Dowel, Cut 12 inches, 3/4 thick or wooden dowel to fit the doll piece
-Acrylic paints: Black and Pastel Color Palette
-Fabric Remnants: Crinilon, Tulle, Lace, Velvet,etc.
-Papers: Wall Paper, Piano Paper, Crepe Paper
-Embellishments: Trims, Ribbons, Broken Jewelry
-Glue: E-3000, Clear Caulk, Hot Glue, Hot Glue Sticks
-Glitter, Mica Flakes

Directions:
1. Insert the fitted wooden dowel into the doll piece, glue in place with E-6000 glue or clear caulk, let dry a few hours.
2. Paint your wooden dowel with the acrylic paint of your choice, let dry.
3. Start embellishing your doll wand with a fabric, crinilon, lace or paper to make a neck collar.
4. Add broken jewelry bits, old buttons, rhinestones, trims on the dolls neck collar, and her hair using hot glue.
5. Finish with glitter or mica flakes where desired.

Project Options and Tricks:
-Add a crown/tiara to doll head, glue in place with E-6000 glue or caulk.
-Wrap ribbon, velvet, lace, piano paper or crepe paper around the wooden dowel.
-Cover the doll hair in rhinestones, sequins or glitter.
-Add fairy wings, millinery flowers or halo to the doll.

Tuesday, February 17, 2009

Sailor's Valentine Project

Sailor's Valentine Project

Materials
-Unfinished Wood Plaque, in heart, oval, or square shaped (Craft Stores)
-Fabric and Velvet scraps
-Bag of tiny shells
-Bag of medium/large sized shells
-Broken china pieces
-Buttons: Pearly and rustic colors
-Vintage ephemera, Images, cards
-paper doilies
-Hot glue, glue sticks
-E-6000 glue or clear caulk or vinyl spackle
-Other: ribbons, charms, millinery flowers, broken jewelry

Directions
1. Lay scrap fabric or velvet onto the plaque, measure to fit, hot glue to front of plaque and to the back of plaque.
2. Arrange your preferred doilies, ephemera, and images onto the velvet layered plaque, until you are satisfied with the arrangement, hot glue in place.
3. Now start layering shells around the border of the plaque, starting with the large shells first, then medium, fill in with the tiny shells, using E-6000 glue to hold in place, let set for a few hours.
4. Next finish embellishing your sailor valentine with broken china pieces, charms, ribbon work, broken jewelry, etc.

Tips:-If you do not have E-6000 glue, glue the shells, china bits, broken jewelry in place with either clear caulk or vinyl spackle.

-When working with any strong glue, use in a well ventilated are.

-Use pre-cautions with hot glue, if burned, dip into ice water immediately.

-Instead of velvet or fabric scraps use piano paper or vintage ephemera for the base before layering with shells and bits.

-Try an old bisque doll head in the center, glue in place with clear caulk, let dry, and layer with bits and pieces.

I will upload examples soon!

Sunday, February 8, 2009

Dresden Trim Ornament Project!

Dresden Trim Ornament Project!
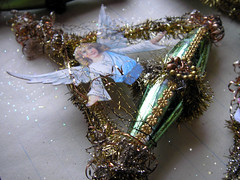
Dresden Ornament! Angel!

What's better then a project consisting of Dresden trim, antique silver glitter, tinsel and vintage boullion, uhm....nothing, well maybe a 5 scoop hot fudge and toffee sundae with extra whipped cream and cherries, that could really top this, LOL!

Okay, I have been re-visiting my inner vintage and for the past year I have been experimenting with old projects from Dennison books, old crepe paper books, crafts and design books, vintage christmas catalogs and more, looking for ways to simplify the projects I saw, and giving them a twist, some pastel colors, mixed with gold or over the top distressed. As a result I have re-discovered the art of our past and learned to make over 28 vintage items from crepe paper dolls made 5 different ways, tiny styrophom angels, cone dolls, Victorian Ornaments, Paper Mache goodies, Charlotte Dolls, Carnival Dolls and more.
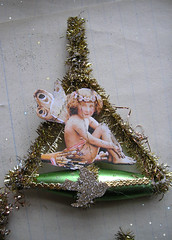
Dresden Ornament! Fairy
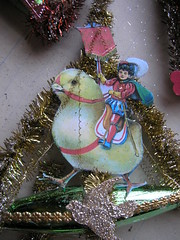
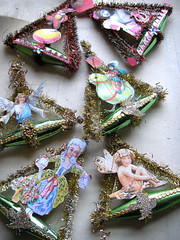
The following project was created from a turn of the century ornament I have, it acted as the muse for this project made from Dresden Trim, tinsel, boullion, images and a small oval Christmas Ornament, along with some supplies.
Dresden Ornament! Spring!
Here are the instructions, which will be followed by a quick demo!

Dresden Trim Ornament
Materials
-Small oval shaped Christmas Ornament (about 2 to 3 inches long)
-Two thick Chenille Stems in Metallic Gold
-One strand of boullion
-A strip of thin Dresden trim
-Dresden trim small medallion shape, or tiny gold charm
-Vintage image of choice
-Small piece of scrap book paper
-Antique Silver Glitter (Martha Stewart)
-Hot glue, glue gun, regular glue stick
-Scissors

Directions
1. Wrap a piece of chenille stem around the center of the Christmas ornament, only once, with hot glue, cut the left over stem to 4 inches, repeat on the left and right side ends of the bulb. (Refer to project sample and demo).
2. Twist the three ends to form a triangle shape.
3. Choose a vintage image that is sized to fit the center of the ornament, between the bulb base and the chenille stem top. Layer your image onto sturdy card stock, with glue stick, then cut out and hot glue to center of the bulb.
4. Hot glue the thin dresden trim down, alond the front center of the bulb.
5. Wrap the ornament 4 times, with un-raveled boullion, hot glue end in place.
6. Glue on some silver glitter
7. Finish embellishing with Dresden medallions, extra trim or other vintage oddities.

Tips/Hints:
1. Use ditressed tinsel, refer to project below this post.
2. Use red or pink chenille stems for Valentines Day or Easter.
3. If you don't have boullion, use tin DMC metallic gold thread, unravel a bit.
4. Try using a round Christmas Bulb or painted styrophom ball instead of the oval ornament.
5. Use images of family members in place of Victorian Clip art or collage images.
6. Use Small paper craft punches, cover them in silver or gold vintage glass glitter or Martha's Antique silver glitter, in place of the Dresden trim medallion.
Dresden Glass Ornaments!

Distressing Tinsel, Chenille Stems/Pipe Cleaners!

Distressing Tinsel, Chenille Stems/Pipe Cleaners!

Do any of you like the look of aged Tinsel, those vintage raggedy distressed strands of glimmer and age, if you said yes, then you are in the right place. For years I have searched Antique Markets, Flea Markets, Garage Sales, Vintage Fairs and Online to get my hands of old Tinsel. When I have found it, the price is beyond reason, sometime sfetching $150 for a few feet at best. There are reproductions which look very old and save on your budget, but after awhile when you are using alot of it, the price can add up! That's when I said, if we can age paper, fabric, and other materials why not new chenille stems formally known as Pipe Cleaners, which come in a variety sizes, colors, and shapes, from Metallic to fluffy pastels, the colors are endless and always available, however if its a vintage look you are seeking, these bright shiny stems ususally cheapen the look since they are well new. I'm here to change that.

Now I know there are several vintage artists out there, all who have their own methods and techniques, after all, having options in art in what I love. For this project you will need the following:

Materials:
-Chenille stems, in any shape, color, size or thin Metallic Christmas Garland
-Liquid starch
-Expresso, dark brown or deep taupe acrylic craft paint
-Old cookie sheet or metal pan
-Paper plate
-Water cup and large paint brush
-Scissors

Directions
1. Pour enough liquid starch onto a paper plate, covering the whole center of it.
2. Squeeze out 4 drops of acrylic paint into the liquid starch, stir, until you get a muddy and cloudy looking paint mix.
3. Now drop your chenille stem into the mixture, and with apint brush brush on the mix until coat, shake off excess and place on cookie sheet or metal pan to dry, about 10 to 15 minutes, repeat the steps above at least 4 times for the best grunge look.
4. Now when satisfied with the aging process, distress your tinsel to achieve that choppy sparce look, with a craft scissor, just randomly cut into the chenille stem, cutting out and trimming the stem.
5. Your done, start making some new vintage art.

Hints/Tips:
-The liquid starch also works as a stiffener to dull and stiffen the tinsel, for that old brittle feel.
-For extra aging take a cheese cloth or a bingy cloth and dip into a can of shoe polish. Then wipe directly onto the already aged chenille stem, until you achieve that extra grunge.
-With hot water mix coffee, and tea packets until dark, place in an oven safe glass pan, pour in, about 1/4 deep, lay your vast batch of un-aged chenille stems into the glass pan, bake at 375 degrees for 10-15 minutes, all over ranges differ, so please keep an eye on the pan, so you don't have a burn batch.
-You could also use antiquing mediums as well!

For a demo of this, click on the link below. The video is a bit grainy, since I had to use my regular camera to film, until we get our Flip camera, then I will re-shoot for you, but for now, this shows you and can be used as a guide with the above instructions and tips!

Distressing Crepe Paper, Tinting Mica Flakes Recipes!

Here is my recipe for distressing crepe paper and letting clear mica flakes look tinted:

Materials:
-Cream Crepe Paper (Use White, or Beige for a substitute)
-Perfect Pearls (Rustic Colors: Gold, Bronze, etc.)
-Martha Stewart Clear Mica Flakes
-Elmers Gel Glue

Directions:
1. Layer the desired art piece with crepe paper such as crepe papering the bottom of a crown base for a ruffled look or using crepe paper to make a doll skirt or a collar.
2. Now cover the crepe paper with the Gel glue, rubbing the glue onto the crepe paper with your fingers, lightly.
3. While the glue is still wet, dip your finger into the perfect pearl color of choice and rub into the wet glue, again, lightly.
4. Rub some more glue onto the top of this, then sprinkle with Mica Flakes, tap off excess and let dry for an hour.

This will give you the same look of the doll collar on my Faerie Shrine Ciagr Box Front Cover.

Other Options:
-Using strong coffee that's been steaping for a day to paint onto the crepe paper, or strong tea.
-Use antique glazing medium to spread onto the crepe paper.

For Dying/Staining Mica Flakes:

Materials:
-Small paper bowl (soup bowl size)
-2 Tablespoons Water
-2 squirts of Tim Holtz Distressing Ink in Walnut
-Clear Mica Flakes by Martha Stewart

Directions
1. Drop 2 Tablespoons water into small bowl
2. Squirt the ink into the water, mix with a craft stick or plastic spoon
3. Pour mica flakes into the bowl until covered, mix, let dry over night.
4. Now decorate your favorite projects!
Options:
-Use other ink colors for different looks
-Try food coloring.

Tiara/Crown Tutorial

The Tiara/Crown Tutorial!

Hello All,

As I promised, here is a tutorial for making paper or fabric crowns.


Materials:

-Large Poster Board Sheet, Any color (or) Sturdy Cardstock

-Generic Paper/Cardstock

-A multitude of designer Papers or Fabric ( Designer, Scrapbook, Wallpaper, or Contact Paper, basically prints which you like)

-A variety of Vintage Images

-Fabric Trims: Scraps, Tinsel, Holiday Tinsel Garland, Sequims, Ribbons, Etc.

-Glue

-Paints, Inks, Glitters, Glitter Pens/Glues

-Gesso and Gel Medium

-Scissors: tiny and regular sizes, decorative (optional)

-Oddities: Jewelry Bits/Findings, Rhinestones, Metal Pieces, letters: Foam, Wood, ChipBoard, ect.


1.Measure your head, to determine the size of your crown.

2.Make a Pattern for your crown. Go from classic point top, to large and wavy, the choice is yours. See my crowns for examples or research crown/tiara shapes on the computer or book store.

3. After you have traced your pattern onto the poster board, cut it out.

4. Now apply some generic paper in anycolor to the poster board crown on both sides with glue, making sure to get all the bubbles out. A brayer or rolling pin works well, let dry!

5. Now apply a layer of gesso to both sides, let dry.

6. Next find paper that you like and apply to the poster board on both sides with glue, again rolling out the air bubbles. Try using a mix of papers for a more unique look. Example: The inside of the crown could be beige paper and the outside main part could be striped paper.

7. When glue is dry, apply a layer of gel medium to both sides of the crown. This gives the piece flexibility, to bend with out distorted cracks or weird paper bubbles and lines.

8. When Gel Medium dries, you are ready to paint, embellish, decorate your crown.

9. For crown security and to keep on your head, I glue ribbon to the middle of each crown end, so I can tie it closed with a bow. Example: think of how you tie and apron closed.

10. Last Step, get a cup of tea, find your favorite chair and put on your crown that you made, which is fit for a Queen!

When making Image Transfers

When making Image Transfers:
1. Try using lazer copies, go to staples or a copy center and make a color copy of the images you want to use. Then place color side down onto the packaging tape, and smooth the image into it really good.Then soak in water for a minute or two, needs to be really wet. Then start rubbing it off, should work then, let me know if it doesn't.

2. Another great way to transfer images is to take a wood stain pen usually in a neutral color, or a wood blender pen. place lazer color copy down on piece you are transfering to, and saturate with the marker on the back side, until image is transfered, then seal with matte sealer or gel medium.

3. Liquid Sculpty, pour/rub liquid sculpty over lazer color copy, bake, then soak in water and rub off. Try using translucent sculpty for a backdrop!

Vintage Crepe Paper and Party Decorating Book!

Vintage Crepe Paper and Party Decorating Book!
I love Vintage, anything vintage, pretty much every decade in time has some kind of appeal to me, from Ancient Egypt, Mythological Greece (Atlantis), Renaissance, Edwardian, Marie Antoinette's France, Colonial, Regency, Victorian, The Roaring Twenties, Gilded Age, 1950's, and in between. I won't consider 80's vintage yet, then I will start to reveal my age! LOL!

Lately I have been fascinated by: Marie Antoinette, Victorian, Roaring Twenties and 1950's Soda Pop Chic or Cupcake Chic as I like to call it. Buying images, prints, books from children to bake and craft books, ephemera, tea ware, costumes, dolls and other eclectic oddities.


On a stroll through my fave antique center: Blackwell Antiques Center in Dover, NJ I happened upon some amazing vintage treasures such as a few children illustrations, postcards, game pieces, doll clothes and these two incredible books:


Dennison's How To Make Party Favors and Table Decorations 1928 and Dennison's How To Make Crepe Paper Flowers 1929 Can I just say I love these, they have re-inspired my vintage muse and have given me a whole new love for Crepe Paper....
Here is a preview of some of the pages in the Party Favors Book which are amazing:


One wonderful artist who I met through pure serendipity and who I consider a dear friend is ANN-DENISE ANDERSON http://whimandfancydesigns.blogspot.com/
to me she is the Queen of Crepe, her whimsical works always put a smile on my face!


P.S. Click on the pictures for a larger view so you can view the writing, directions and images!